> For the complete Linea documentation index, see [llms.txt](/llms.txt).
> Agents can fetch this page as Markdown at [https://docs.linea.build/network/build/launch-an-app/app.md](https://docs.linea.build/network/build/launch-an-app/app.md).
# Build your app
Now that you've deployed and verified your smart contract in [part one](/network/build/launch-an-app/deploy), the next step is to create a frontend app that enables users to connect their wallet and interact with the smart contract.
In this guide, we will:
1. Set up a Next.js app
2. Configure our app to connect to Linea Sepolia and your MetaMask wallet
3. Add buttons to the app to interact with your smart contract.
> _Estimated time to complete: ~25 minutes._
## Prerequisites
A wallet that can connect to Linea Sepolia. We recommend [MetaMask](https://metamask.io/).
[Get some Linea Sepolia ETH](/network/build/get-testnet-eth).
## Set up a Next.js app
There are many frameworks out there for building web apps. We're going to focus on [Next.js](https://nextjs.org/), a React framework.
Create a new Next.js app using the following command:
```bash
npx create-next-app@latest my-linea-app
```
You'll be prompted to configure your project. Select the following options:
- TypeScript: Yes
- ESLint: Yes
- Tailwind CSS: Yes (optional, but recommended for styling)
- `src/` directory: No
- App Router: Yes
- Import alias: No (or customize as preferred)
Once the setup is complete, navigate to your project directory:
```bash
cd my-linea-app
```
## Install dependencies
Install the MetaMask Embedded Wallets SDK and other required packages:
```bash
npm install @web3auth/modal wagmi viem@2.x @tanstack/react-query
```
This installs:
- `@web3auth/modal`: MetaMask Embedded Wallets SDK
- `wagmi`: React hooks for Ethereum
- `viem`: TypeScript interface for Ethereum
- `@tanstack/react-query`: Required for Wagmi's data fetching
Once the installation is complete, you can run `npm run dev` to start the app locally.
### Add a "Connect wallet" button
The first step to making the app usable is enabling visitors to connect their wallet. We'll use MetaMask Embedded Wallets (Web3Auth) SDK, which provides seamless authentication with social logins, external wallets, and more. The SDK works alongside Wagmi to provide a complete web3 authentication and interaction solution.
To set up the wallet connection, you'll need to sign up for a free MetaMask Embedded Wallets account at [dashboard.web3auth.io](https://dashboard.web3auth.io), which gives you access to the dashboard for configuration.
#### Get your Client ID
After signing up and accessing your MetaMask Embedded Wallets Dashboard, create a new project on `sapphire_devnet`and navigate to **Project Settings** to find your Client ID. Copy this value as you'll need it for configuration.
#### Configure Web3Auth & Wagmi Provider
Create a configuration file for Web3Auth & Wagmi in your project. This file will be used to wrap your app state with the wallet & blockchain connection providers. Create a new file at `components/provider.tsx`:
```tsx
"use client";
import React from "react";
// Web3Auth Imports
import { Web3AuthProvider, type Web3AuthContextConfig } from "@web3auth/modal/react";
import { IWeb3AuthState, WEB3AUTH_NETWORK } from "@web3auth/modal";
// Wagmi Imports
import { WagmiProvider } from "@web3auth/modal/react/wagmi";
import { QueryClient, QueryClientProvider } from "@tanstack/react-query";
// QueryClient for Wagmi Hooks Configuration
const queryClient = new QueryClient();
// Web3Auth Configuration
const web3AuthContextConfig: Web3AuthContextConfig = {
web3AuthOptions: {
clientId: 'YOUR_WEB3AUTH_CLIENT_ID', // Pass your Web3Auth Client ID, ideally using an environment variable // Get your Client ID from Web3Auth Dashboard
web3AuthNetwork: WEB3AUTH_NETWORK.SAPPHIRE_DEVNET, // or WEB3AUTH_NETWORK.SAPPHIRE_MAINNET
}
};
// Provider Component
export default function Provider({ children }:
{ children: React.ReactNode }) {
return (
{children}
);
}
```
#### Setup provider in app
In your main entry file (typically `app/layout.tsx` for App Router or `pages/_app.tsx` for Pages Router), import the `Provider` and wrap your application:
```tsx
import React from "react";
import Provider from "../components/provider";
import "./globals.css";
import { Inter } from "next/font/google";
const inter = Inter({ subsets: ["latin"] });
export const metadata = {
title: "My Linea App",
description: "My Linea App",
};
export default async function RootLayout({ children }: { children: React.ReactNode }) {
return (
{children}
);
}
```
#### Enable Linea networks on dashboard
To enable Linea and Linea Sepolia networks:
1. Go to your MetaMask Embedded Wallets Dashboard
2. Navigate to the **Chains & Networks** tab in the sidebar of your project
3. Search for "Linea" in the chains list
4. Enable both **Linea** and **Linea Sepolia** networks
5. Save your configuration
Once enabled, all MetaMask Embedded Wallets SDKs will automatically connect to these networks—no code updates needed.
#### Add connect button component
Create a simple connect wallet component. In your `app/components` directory, create a new file called `ConnectWallet.tsx`:
```tsx
// app/components/ConnectWallet.tsx
import { useWeb3AuthConnect, useWeb3AuthDisconnect, useWeb3AuthUser } from "@web3auth/modal/react";
export default function ConnectWallet() {
const { connect, isConnected, loading: connectLoading, error: connectError } = useWeb3AuthConnect();
const { disconnect, loading: disconnectLoading, error: disconnectError } = useWeb3AuthDisconnect();
const { userInfo } = useWeb3AuthUser();
return (
)
}
```
If you now run `npm run dev`, you'll be able to connect your wallet on Linea and Linea Sepolia. We now have the barebones of a web3 app: a frontend web app to which you can connect your wallet.
## Interact with your contract
Given the functionality of the contract we deployed in [part one](/network/build/launch-an-app/deploy), we'll need a button to interact with the contract, prompting a transaction that will call our smart contract's `increment()` function and increment the counter. It'll also be helpful to display the current counter value in the app.
To implement these features, we'll be using Wagmi hooks:
- [`useReadContract`](https://wagmi.sh/react/api/hooks/useReadContract) to read the current counter value, and;
- [`useWriteContract`](https://wagmi.sh/react/api/hooks/useWriteContract) to call the smart contract's `increment()` function, and increase the counter.
### Display the counter value
To display the counter value, we'll use the Wagmi `useReadContract` hook to retrieve the value from the contract and display it in the app.
#### Get the ABI
Next, we'll need the smart contract's application binary interface (ABI)—a kind of standardized data structure that defines the inputs and outputs necessary for other programs to interact with the smart contract. This is a necessary step to ensure the Wagmi hooks work.
You can find it by pasting the smart contract address into the [Linea Sepolia block explorer](https://sepolia.lineascan.build/). Find the "Contract" tab and scroll down to "Contract ABI". Copy the code:
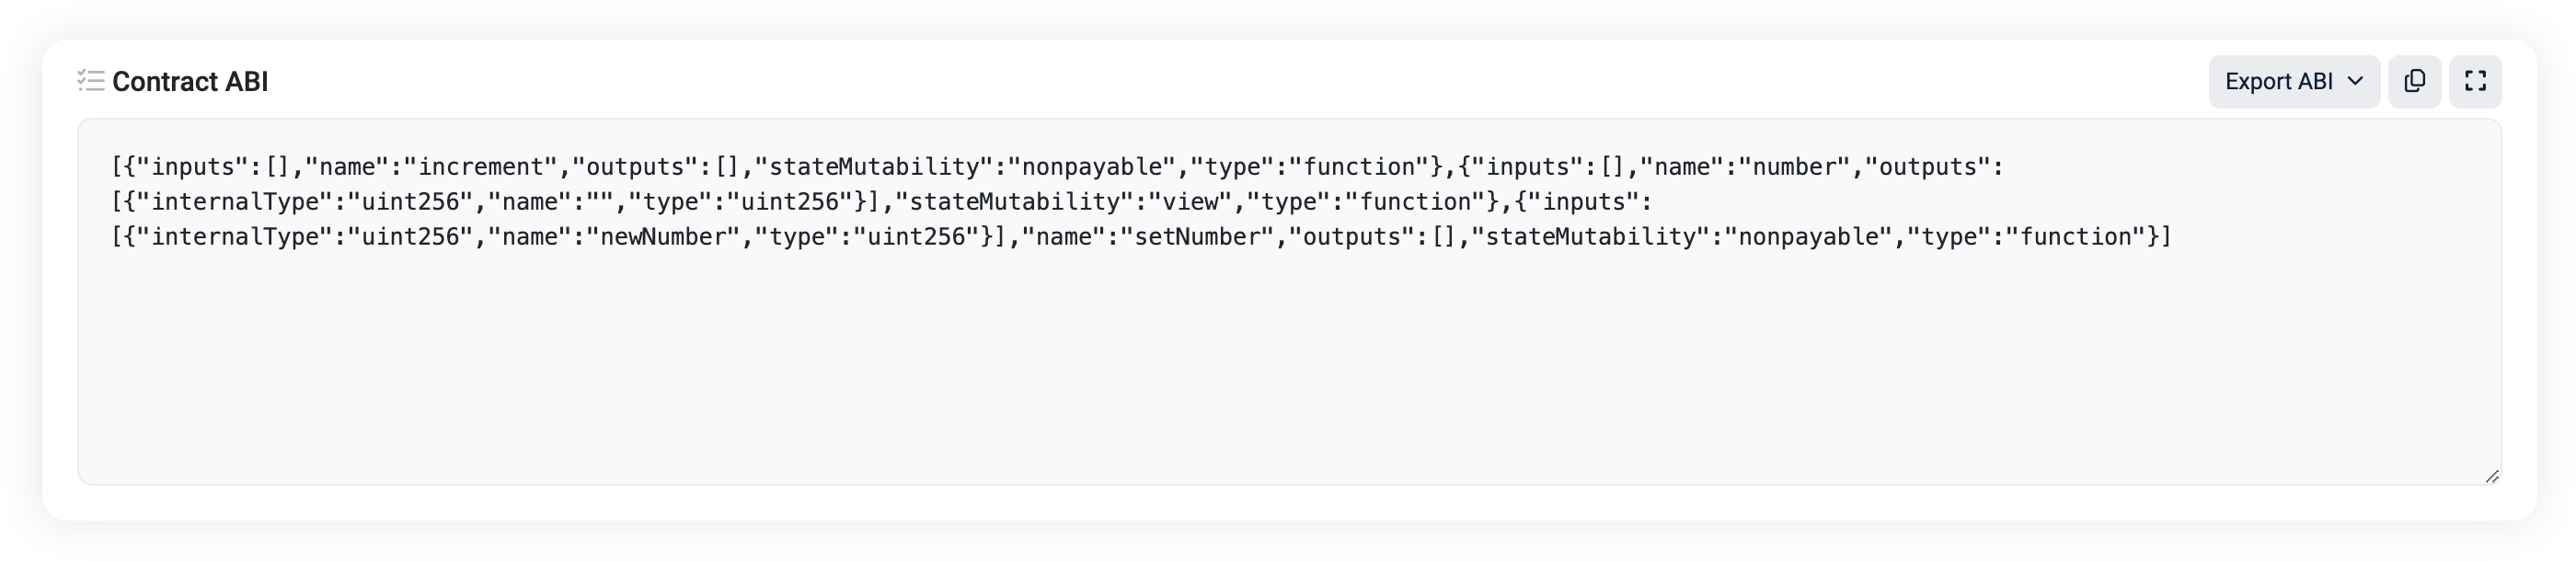
Head back to your project repo and paste the code into a new file in your `lib` directory called `abi.ts`, adjusting the formatting:
```tsx
// lib/abi.ts
export const abi = [
{
"inputs":[],
"name":"increment",
"outputs":[],
"stateMutability":"nonpayable",
"type":"function"
},
{
"inputs":[],
"name":"number",
"outputs":[{"internalType":"uint256","name":"","type":"uint256"}],
"stateMutability":"view",
"type":"function"
},
{
"inputs":[{"internalType":"uint256","name":"newNumber","type":"uint256"}],
"name":"setNumber",
"outputs":[],
"stateMutability":"nonpayable",
"type":"function"
}
]
```
#### Create counter component
Fetching the counter value from the smart contract and displaying it in the app requires more code than we could neatly place in `page.tsx`. Instead, we'll create a React component in `app/components` and import it into `page.tsx`.
Head to `app/components` in your project and create a new file, `Counter.tsx`, and add the below code:
```tsx
// app/components/Counter.tsx
import { useReadContract } from "wagmi";
import { abi } from "@/lib/abi";
export default function Counter() {
const {
data: counterValue,
error,
isPending,
refetch
} = useReadContract({
address: "0x0000000000000000000000000000000000000000" as `0x${string}`, // Replace with your deployed contract address
abi: abi,
functionName: "number",
});
const statusText = isPending
? "Loading..."
: error
? "Error: " + error.shortMessage
: `Counter: ${counterValue?.toString() ?? "?"}`;
return (
);
}
```
note
Make sure to insert the address of your deployed smart contract.
The component imports the `useReadContract` hook and the ABI you added previously. It then calls our contract's `number()` function using `useReadContract` and displays the result in a button in the app. We've also added some logic that displays "Loading..." while the data is being fetched, an error handling message that displays errors that are built into `useReadContract`, and the ability to click the button to refresh the data.
#### Add counter component your app
Go back to your `page.tsx` and, alongside the existing import statements, add statements to import the components you just created:
```tsx
import Counter from './components/Counter';
import ConnectWallet from './components/ConnectWallet';
```
Now we can insert the components into the page:
```tsx
```
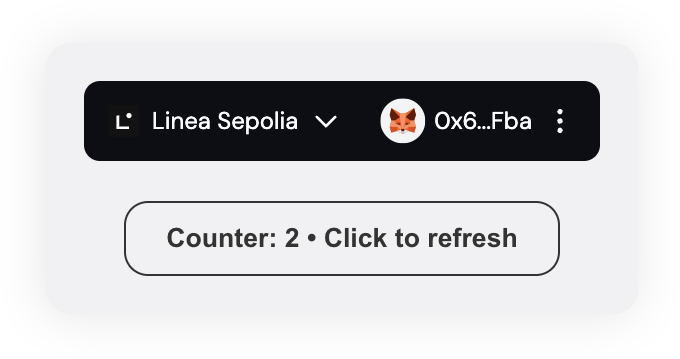
You can test the component works by heading to Lineascan and calling the `increment()` function on the Contract > Write Contract page. Click the "Connect to Web3" button to connect your wallet, and then "Write" to prompt a transaction from your wallet that will increment the counter. If you head back to your app and retrieve new data, you'll see that the counter has been incremented by 1.
Here's how it looks:
### Add a button to increment the counter
Our method for calling the `increment()` function in our smart contract is to use the Wagmi hook `useWriteContract`. Instead of reading data this time, we're asking the smart contract to do some computation—incrementing the counter—which means we need to send a transaction with gas to pay for the computation.
Since we've already configured `wagmi.ts` file and created `abi.ts`, we can move straight to adding the component.
### Create increment component
Head to `app/components` and add a new file called `Increment.tsx`. Paste in this code, making sure to replace the placeholder address with the address of your deployed smart contract:
```tsx
// app/components/Increment.tsx
import { useWriteContract } from "wagmi";
import { abi } from "@/lib/abi";
export default function Increment() {
const { writeContract, isPending } = useWriteContract();
const handleIncrement = () => {
writeContract({
address: "0x0000000000000000000000000000000000000000" as `0x${string}`, // Replace with your deployed contract address
abi: abi,
functionName: "increment",
});
};
return (
);
}
```
### Add the increment component to your app
Go back to your `page.tsx` and, alongside the existing import statements, add a statement to import the component you just created:
```tsx
import Increment from './components/Increment';
```
Now we can insert the component into the page:
```tsx
```
## Test your app
Now that everything is in place, we can test the app.
Run `npm run dev` to run your app locally.
The counter button should display the counter value already, and you can click to fetch the latest value at any time without sending a transaction. With your wallet connected and some Linea Sepolia ETH, you should be able to click the "Increment Counter" button to add +1 to the counter value:
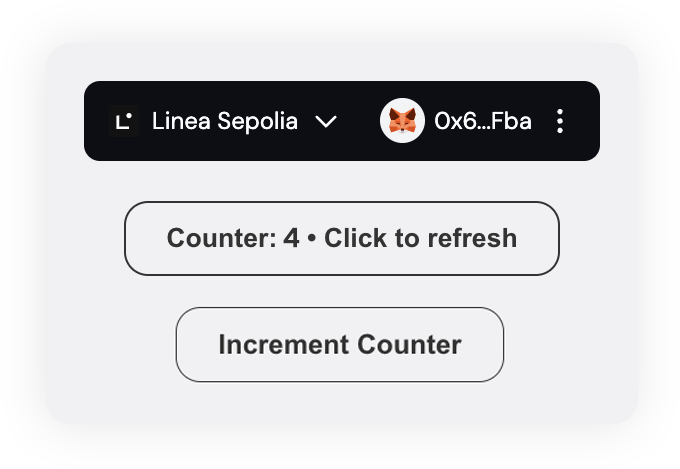
There you have it! A functioning web3-enabled app that interacts with a smart contract.
## Deploy your app
Now that you have a working app, you can deploy it to make it publicly accessible. As we've been using Next.js, a framework developed by Vercel, we can easily use Vercel to deploy our app for free.
Since we're working on Linea Sepolia, we don't have the usual security concerns we'd need for a production app, so we can go straight ahead.
### Add your repository to GitHub
Initialize a git repository for your project if you haven't already:
```bash
git init
```
This will allow you to track your changes.
Firstly, run `npm run build` to build the app. This should surface any errors in your code that may prevent it from being deployed. If you need help resolving any, use the [support site](https://support.linea.build/).
When you're ready, make sure you've staged your changes with `git add .` and then committed them:
```bash
git commit -m "Initial commit"
```
Now you're ready to publish your repository to GitHub. The easiest method is to [download and use GitHub Desktop](https://docs.github.com/en/desktop/adding-and-cloning-repositories/adding-a-repository-from-your-local-computer-to-github-desktop), though if you're comfortable with git, you might prefer [using the command line](https://docs.github.com/en/migrations/importing-source-code/using-the-command-line-to-import-source-code/adding-locally-hosted-code-to-github#importing-a-git-repository-with-the-command-line).
You can set your repository to public or private depending on your preference. You'll be able to deploy it either way.
### Deploy using Vercel
Now that your repository is on GitHub, you can deploy it using Vercel. [See the Vercel guide for instructions](https://nextjs.org/learn-pages-router/basics/deploying-nextjs-app/deploy).
You'll need to create a Vercel account and link it to your GitHub account. Once you've done that, you can deploy, and manage your app from Vercel.
## Next steps
Now that you have a grasp of the basics, you can start to experiment and build innovative apps that solve real-world problems and attract users. Here are some ideas for taking your app to the next level:
- Build in [account abstraction](/network/build/tools/account-abstraction) features to make your app more accessible and user-friendly.
- Accelerate development by using audited, reliable [contract templates](/network/build/tools/contracts-templates).
- Leverage an [oracle](/network/build/tools/oracles) to fetch data, such as token prices, and display it in your app.
## Help and resources
If you get stuck at any point in this guide, use the [support site](https://support.linea.build/).
- [MetaMask Embedded Wallets React SDK documentation](https://docs.metamask.io/embedded-wallets/sdk/react)
- [Wagmi documentation](https://wagmi.sh/)
- [`useReadContract`](https://wagmi.sh/react/api/hooks/useReadContract)
- [`useWriteContract`](https://wagmi.sh/react/api/hooks/useWriteContract)
- [Linea Sepolia block explorer](https://sepolia.lineascan.build/)